
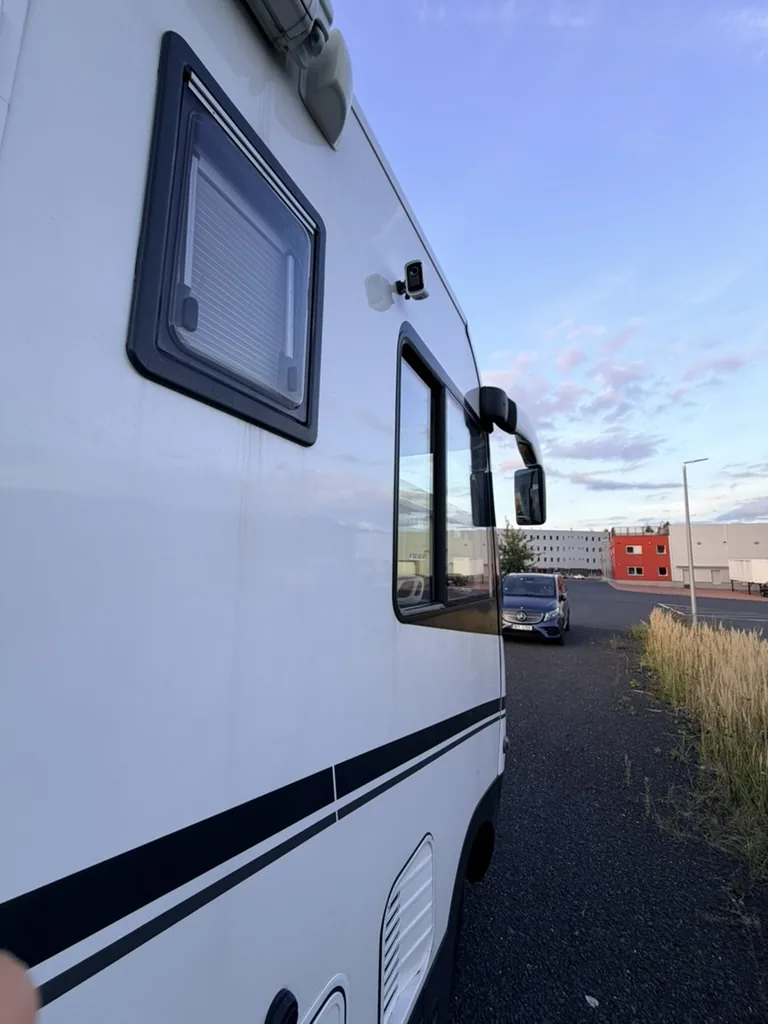
No drilling into the outer skin. That was the only condition I set myself when I started working out how to keep an eye on the Phoenix. Everything else then had to fit around it.
On a motorhome it is not as simple as on a house
At home I would be done in half an hour. A wall, two holes, plugs, finished. On a motorhome several things come together at once.
The camera has to look where I need it to, not at the neighbour's caravan. It should not be obvious at first glance, because I do not want the vehicle to look like a guarded facility on wheels. It must not get in the way when washing. And above all, it must not leave a hole behind.
The skin flexes while driving, freezes and expands, so every hole is a place where sooner or later you end up dealing with sealing. When water starts getting in somewhere, it does not announce itself. You find out from whatever swells up underneath two years later. That is why I had the condition before I even started looking at mounts.
What it is made of
The cameras are eufyCam 3C, they record to a eufy HomeBase 3 base station, and the whole thing is kept connected by a Teltonika RUTX50 router. I have had that in the vehicle for a while now because of internet, and it does not have one line but three: Starlink, 5G from T-Mobile and 5G from Vodafone. It switches between them by itself.
| Part | What it does | Power |
|---|---|---|
| eufyCam 3C | Records in 4K, wireless, weighs a few dozen grams | Own battery |
| eufy HomeBase 3 | Records and recognises faces | 12 V from the vehicle |
| Teltonika RUTX50 | Switches between Starlink and two 5G networks | 12 V from the vehicle |
| PA 12 housing | Protects the camera and carries the whole mount | — |
The base station can tell familiar faces from strangers on its own. It sends nothing to the cloud for that, the video stays in the vehicle. That matters to me more than the feature itself.
Those three lines in the router turned out to matter more for the cameras than I expected. When one drops out, another takes over and most of the time I do not even notice. A camera with no signal is useless — and that is exactly the moment you would need it.
Everything runs off 12 volts
The router and the base station both hang off the vehicle's 12 V system. So I do not have to switch on the 230 V inverter just for the cameras, which is good — it would have to run non-stop and would draw current even doing nothing.
The cameras themselves do not run off the vehicle at all, they have their own battery. That, incidentally, is exactly why nothing had to be drilled. If they needed power from the vehicle, a cable would have to run to them and it would have to get outside somehow. As it is, all that is outside is a housing stuck to the surface, nothing else.
Nylon housings, SLS printed
The housing here does more than just protect. It is also the part the whole mount is built on. The bracket grows straight out of it, it is not a box slipped over something ready-made.
It did not start from scratch. Somebody had already drawn a housing for the eufyCam 3C S300 and offers it for download; a friend found it through the 3D model search engine yeggi.com. His work was to add the mounting features — the GoPro interface and a seat for the screw. They were printed for me by my friend's company SLS.market, which does industrial SLS printing in PA 12 including blasted finishing. I fitted them myself. First a test piece came out in black PLA, which confirmed everything fitted, and only then were the white ones printed for real.
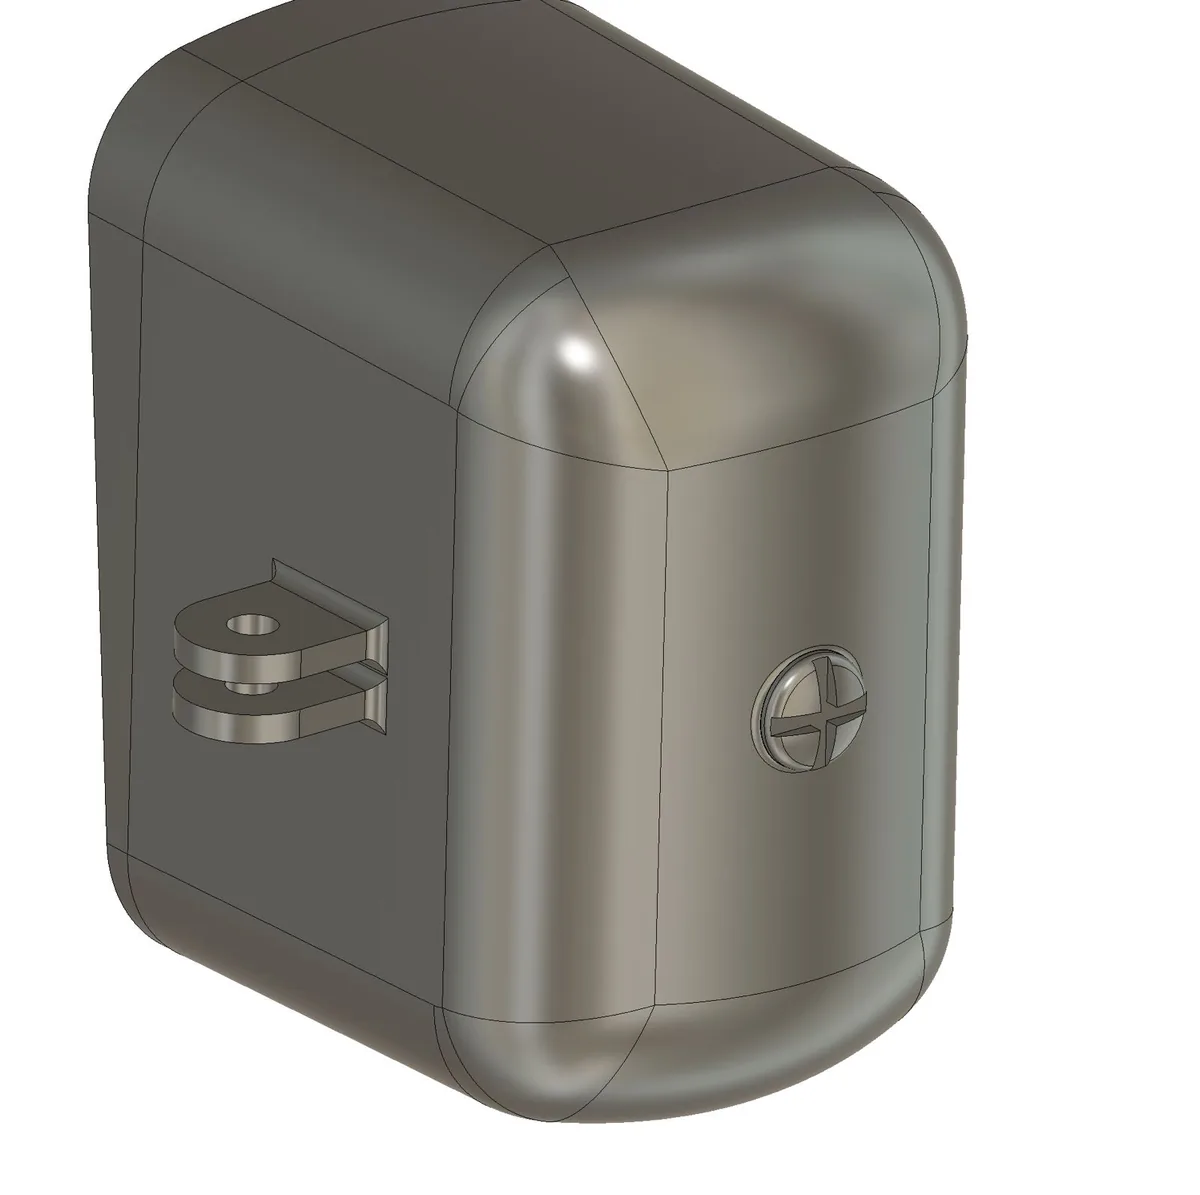
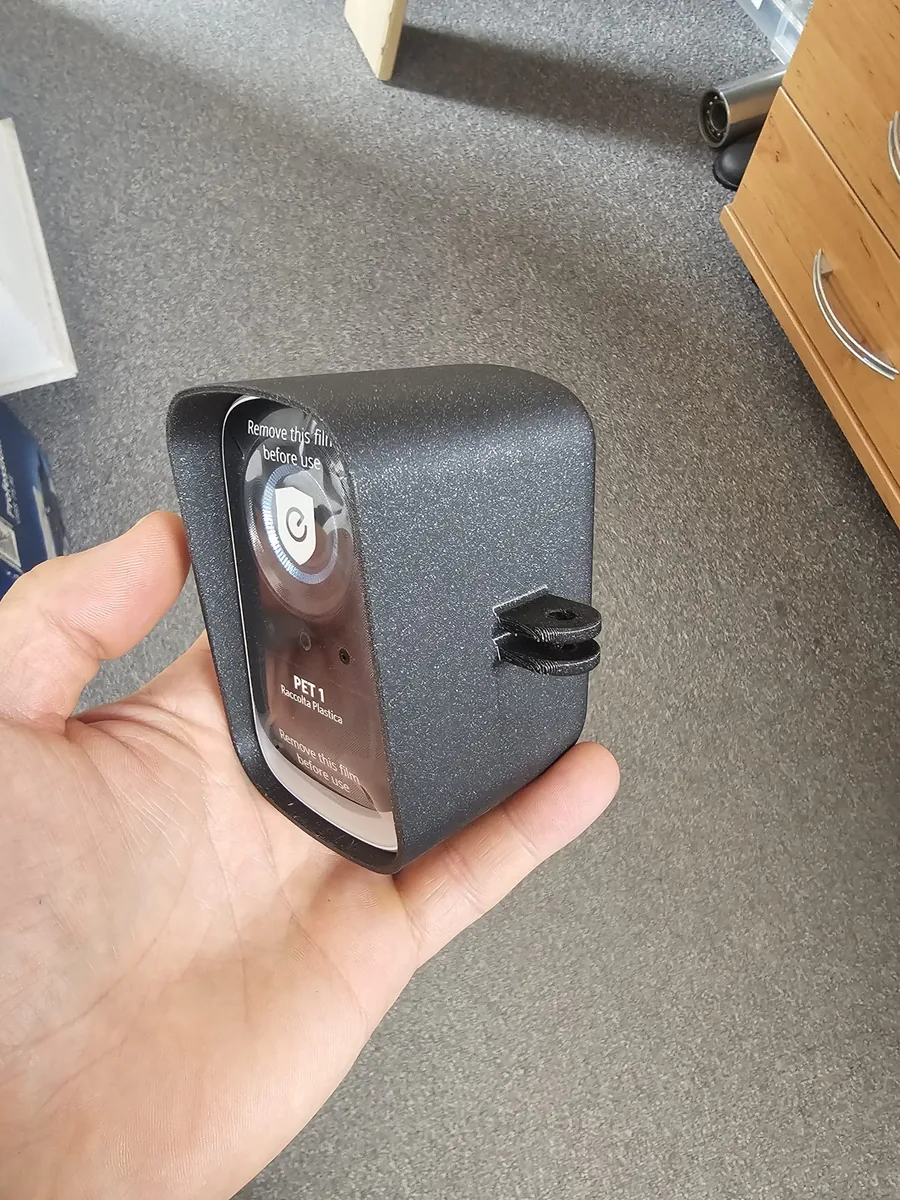
The material is nylon PA 12, printed by SLS: a laser sinters powder layer by layer. That makes the part isotropic — equally strong in every direction, with none of the weak spots between layers where filament printing could eventually crack from vibration fatigue. For something holding a camera outside a moving vehicle, that is what decided it. PLA would not survive a single season outdoors.
One thing I need to put straight, because I had it wrong at first. White PA 12 with no surface treatment can change shade outdoors, and the rough SLS finish holds road grime far more readily than smooth paint does. How a particular powder fares in the sun is a question only its datasheet answers — it is not a blanket property of PA 12, because it depends on the dye and the stabilisation. So I am planning to give the housings a proper exterior coating in time: degrease, key the surface, a plastics primer and a UV-stable topcoat. The load-bearing job stays with the mechanics, though, not with the paint.
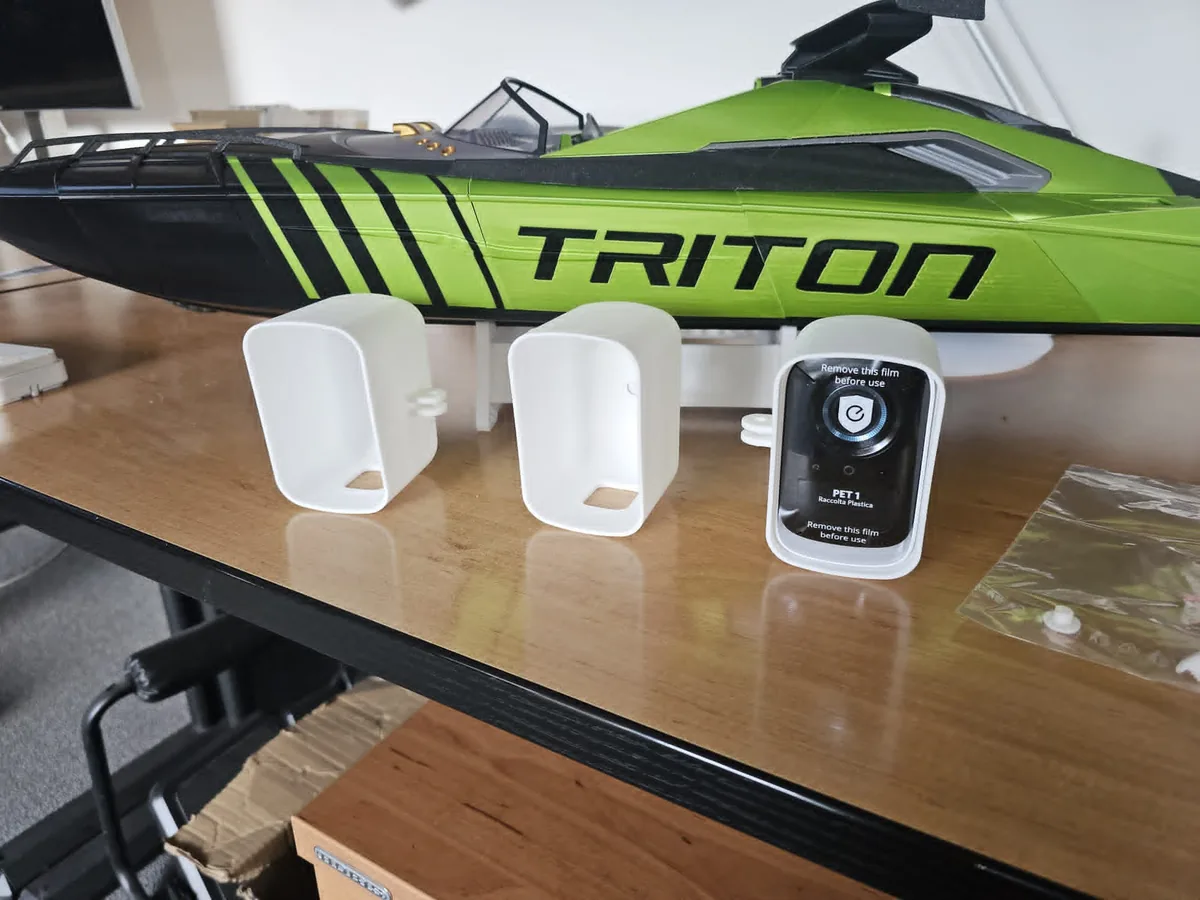
The base housing is neither my work nor my friend's, and it is a paid model, so I cannot pass it on. Anyone who wants it will find it through yeggi.com under „EufyCam 3C S300 Waterproof Cover“. The mounting features were drawn to fit my vehicle and they are not files I would hand out. I am writing here about how I solved it, not a guide to printing it.
Three joints, each doing something different
The whole mount is three joints. If one had to do all of it, it would end up half-hearted in all three respects.
| Joint | What it holds | What it allows |
|---|---|---|
| Printed 1/4" screw | The camera in the housing, so it cannot fall out | Taking the camera out of the housing itself |
| GoPro joint | The housing on the mount | Setting the angle and taking the camera off quickly |
| 3M VHB 5952F | The mount on the bodywork | Fixing it without a single hole |
The camera sits in the housing and is held there by a screw with a quarter-inch tripod thread, the same one every camera has. It is printed too, not metal, and that is deliberate. It carries nothing, the camera sits in the housing on its own. The screw only stops it falling out. A metal one would wear through the plastic over time.
On top of the housing there is a GoPro mount with a swivel joint. The angle gets set once, tightened, and that is that.
What holds it on the vehicle
The GoPro mount base is bonded to the degreased paint with 3M VHB 5952F double-sided tape. No screw, no hole.
VHB is not the double-sided tape from the hardware shop. It is a millimetre of acrylic foam and 3M itself offers it as a replacement for rivets and screws. It conforms to unevenness and holds on paint too. In cars it is used to bond trim and spoilers, so the side of a motorhome is nothing unusual for it.
Numbers from the technical data sheet, so that this is not just an impression:
| Parameter | Value |
|---|---|
| Thickness | 1.1 mm, black acrylic foam |
| Overlap shear strength | 550 kPa (stainless steel) |
| Normal tensile strength | 480 kPa (aluminium) |
| Static load | 57 cm² of tape per 1 kg |
| Dynamic load | Design factor 85 kPa |
| Application temperature | At least 10 °C, ideally 21–38 °C |
| Long term resistance | 93 °C |
| Short term resistance | 149 °C |
| Bond build | Half after 20 minutes, 90 % after a day, full after 72 hours |
The most useful line is the static load. Roughly 57 cm² of tape per kilogram, so a bit more than a postcard. The camera weighs a few dozen grams, so the margin is decent. For anything heavier you would have to do the sums.
This strikes me as more important than the catalogue strength. On an area of 3.23 cm² the 5952 holds around a kilogram in static shear at 23 °C. At 66 °C only half a kilo and at 93 °C a quarter. A wall baking in summer therefore takes away from it, however well the joint is made. A white skin heats up less than a dark one, but you should work with the worse figure.
With bonding the substrate matters as much as the tape. 3M wants isopropyl alcohol with water at 70:30, and a degreaser first on greasier spots. Then patience: after twenty minutes the joint has half its strength, after a day ninety per cent, and full strength only after three days. Sticking it on and heading straight for the motorway is a bad idea.
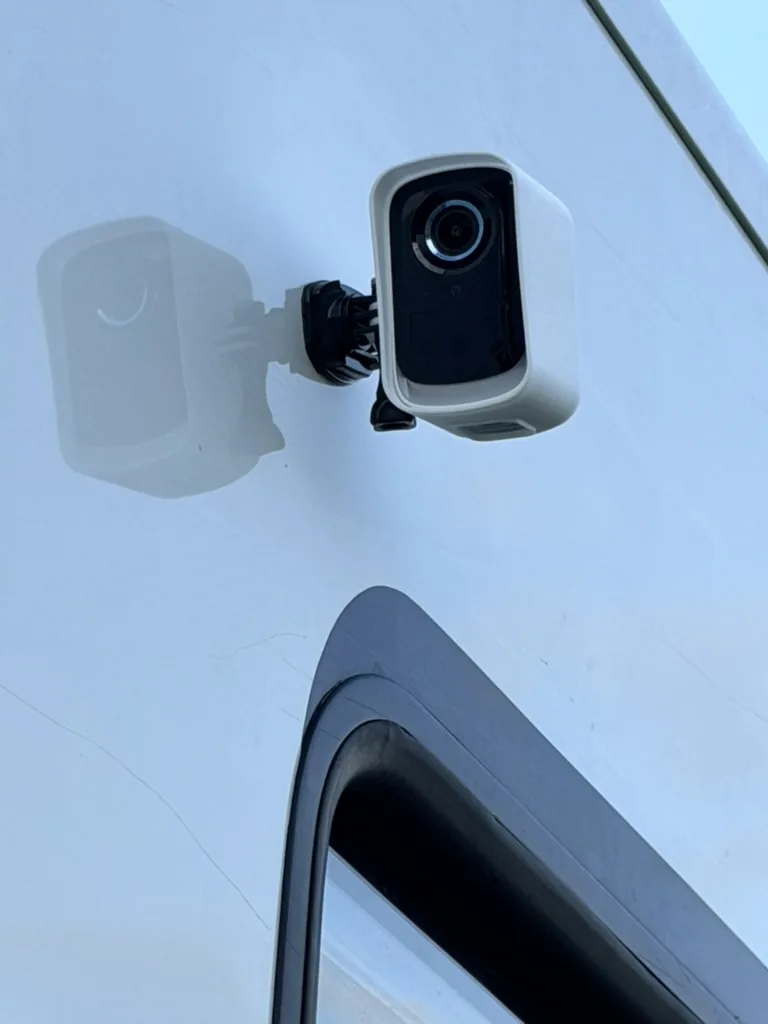
I take the side cameras off before driving
I do not want to bury this among the specifications: the side cameras are not on the vehicle while driving. I take them off before setting out and carry them inside.
That is why the swivel joint matters so much. If I had to hunt for the angle again every time I put a camera back, I would stop doing it after the second trip and find a reason why it is fine as it is. As it is, it takes a few seconds and the camera goes back exactly where it was.
The only one that stays on permanently is the rear camera. That is the only one that travels, so with that one I do not rely on the adhesive alone. It is also secured with a 2 mm cable. If the joint let go, the camera would stay hanging on the vehicle instead of ending up on the road behind me.
It is there for what you cannot plan for. A branch, a lump of ice off a lorry roof, or a mistake I made while bonding and do not know about. It costs a few crowns and turns a potential disaster into an inconvenience.
That it holds applies to this housing, this joint, this paint and this vehicle. It is not a certified installation and 3M itself states that this is an industrial tape not tested for all automotive uses. That is why I take the side cameras off and secure the rear one with a cable. Leaving something hanging over the road on adhesive alone does not strike me as a good idea. Anyone wanting to copy this should work out their own area, their own paint and the weight of their own camera.
How it looks
The cameras are high up on the side, by the entrance and the windows. From that height they see along the whole wall and onto the door, which is exactly what I wanted.
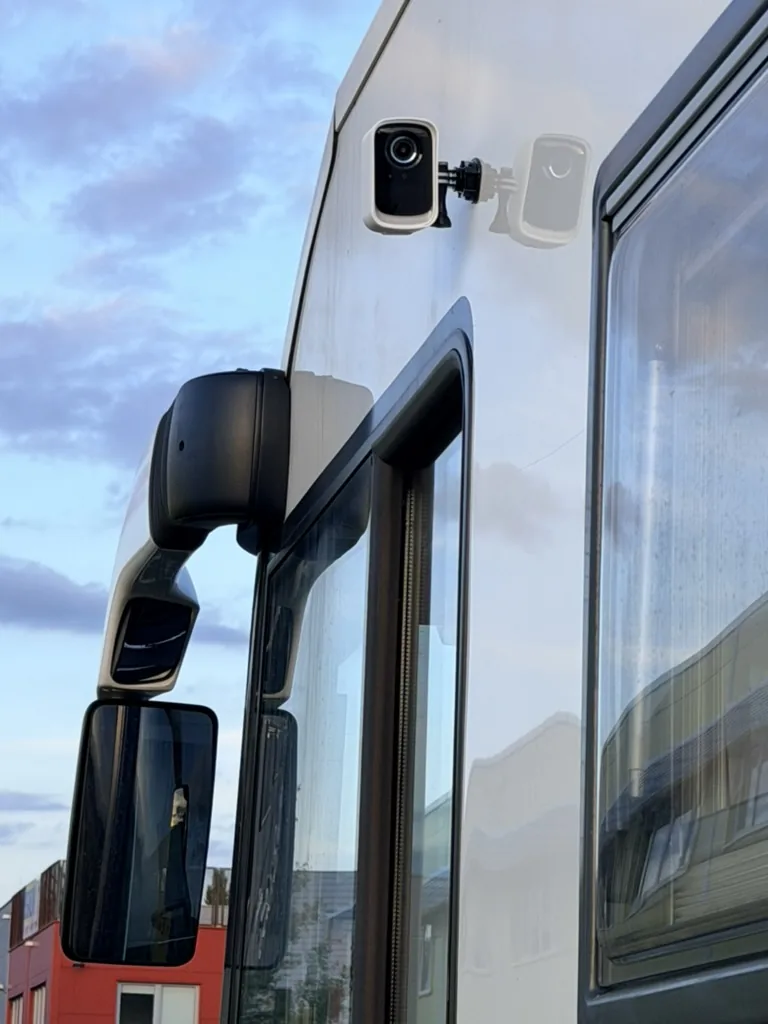
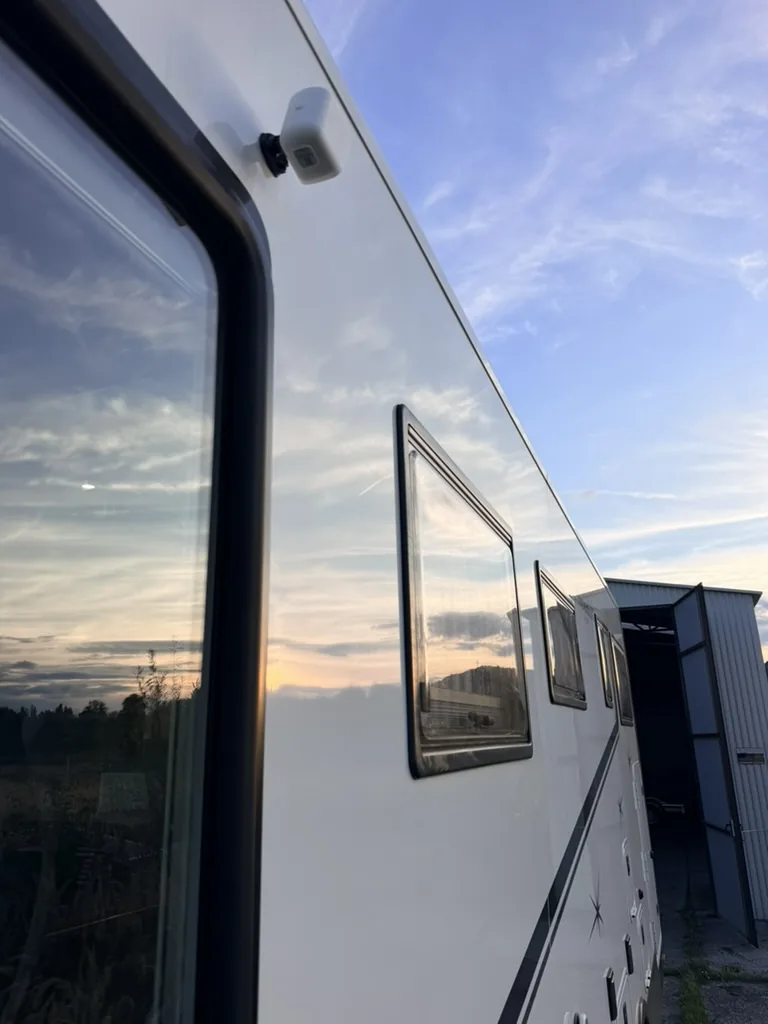
What pleases me most is that it does not show. From a distance nobody connects a white housing on a white skin with security, and the vehicle does not look like a guarded facility.
It is not a kit and was never meant to be one. It came about for one particular vehicle, one camera model and one condition. On another vehicle it would turn out differently.
Conclusion
It does not work thanks to one camera or one bracket. It works because a few things fit together, none of which is remarkable on its own: cameras with their own battery, a base station that records by itself, a router with three lines, a housing from a material that survives outdoors, and a mount that can be taken apart at any time.
First I decided what I did not want to do to the vehicle. Only then did it become clear what it should look like.
A camera on a vehicle does not only film the vehicle. Before fitting one, look into what rules apply in your country to filming public space and to recording people, especially when face recognition is involved. It differs from country to country and I am not covering it here.
And one more thing. A security camera is not a reversing camera and does not replace one, it watches a parked vehicle. Nor is it protection against everything. It is one layer of several and on its own it deters nobody.
Frequently asked questions
Why not drill into the outer skin of a motorhome?
Because you find out about the problem too late. The skin flexes while driving, freezes and expands, so every hole is a place where sooner or later you end up dealing with sealing. When water starts getting in somewhere, you find out from whatever swells up underneath two years later. On top of that comes the intervention into the structure and the question of warranty. I decided to avoid all of it, and that is what I worked from.
Why nylon PA 12 and not an ordinary home print in PLA or PETG?
For strength. In SLS a laser sinters powder, so the part is isotropic — equally strong in every direction and without the weak spots between layers where filament printing could crack from vibration. On a part holding a camera above the road, that settled it. PLA would not survive a season outdoors either, it would soften and yellow. The surface is worth planning for, though: untreated white PA 12 can change shade outdoors and the rough SLS finish holds dirt. How a given powder handles UV is a question for its datasheet, not a blanket claim. An exterior coating takes care of it.
Why is there a GoPro interface in the housing when the camera is held by a tripod screw?
Because each of them does something different. The printed quarter-inch screw only stops the camera falling out of the housing, it carries nothing. The GoPro joint connects the housing to the vehicle and deals with the angle: set once, tightened, and after that the camera is only taken off and clicked back on. For me this is not an occasional thing, I take the side cameras off before every trip. Without the quick release I would be hunting for the framing from scratch every time and after a few trips I would give up.
Do the cameras stay on the vehicle while driving?
The side cameras are not on the vehicle while driving. I take them off before setting out, which thanks to the GoPro joint takes a few seconds. The only one that stays permanently is the rear one, and besides the adhesive that one is secured with a 2 mm cable. As for the tape itself: according to the data sheet 3M VHB 5952F has an overlap shear strength of 550 kPa and a design rule of 57 cm² per kilogram of static load, so with a camera weighing a few dozen grams the margin is large. But in static shear it holds around a kilogram on 3.23 cm² at 23 °C and only a quarter of a kilo at 93 °C, and the joint reaches full strength only after 72 hours. Taking off what does not need to travel and securing the rest with a cable therefore strikes me as more sensible than relying on a catalogue figure.
Does a system like this replace a reversing camera?
No, it was not built for that. A security camera watches a parked vehicle. A reversing camera needs a different field of view, a different position and above all a picture with no delay straight onto a display. They are two different jobs and if I tried to combine them, neither would work properly.
Do you offer the STL files of the housings for download?
No, and they are partly not even my files. The base housing for the eufyCam 3C S300 was drawn by somebody else and it is a paid model; a friend found it through yeggi.com and only added the mounting features to fit my vehicle. So you can find the base yourself under „EufyCam 3C S300 Waterproof Cover“, but you will not get finished files from me. I am writing here about how I solved it, not a guide to printing it.
How that router with three lines is put together and how it switches between them I describe in the article Reliable internet in a campervan →